The other day I got a critical alert from my TrueNAS system that a drive failed a SMART test. So I’ve had to start preparations in case the drive dies on me. Thus the need to migrate all of the content to another pool.
For the context of this post, this is the pool I will be migrating from:

And this is the pool I am going to put the new dataset in:

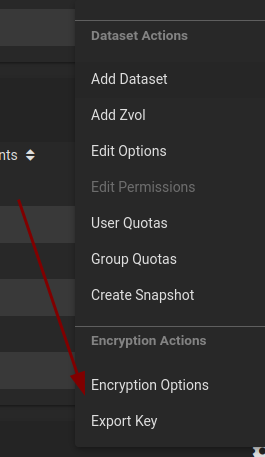
Backing up encryption key
First things first, since the source pool is encrypted, make sure to export the key and back it up somewhere safe. You will need this to unlock the new dataset after replication.
Click on the three dots menu on the far right side of the pool, and at the bottom of the menu click Export Key.

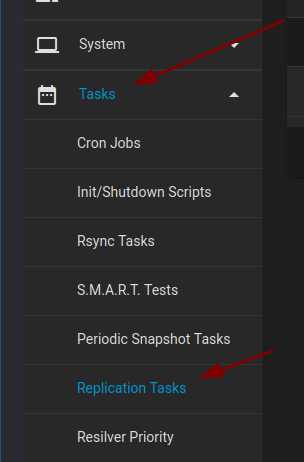
Replication task
You can find the docs for this here.
We then need to begin replicating the dataset, in this case I only have one dataset on the source pool, so I will be migrating only that.
Head into Tasks > Replication Tasks:
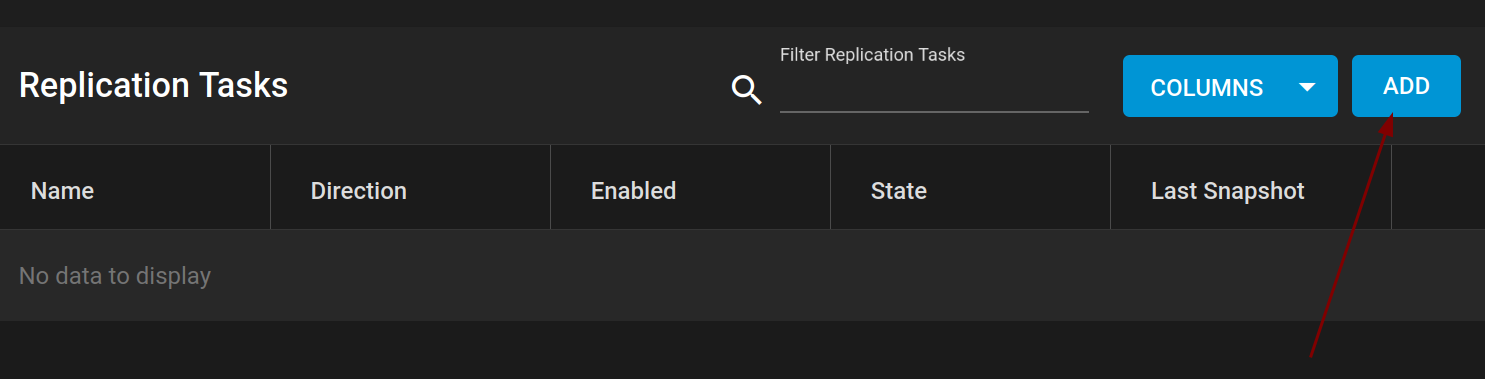
Then click ADD:
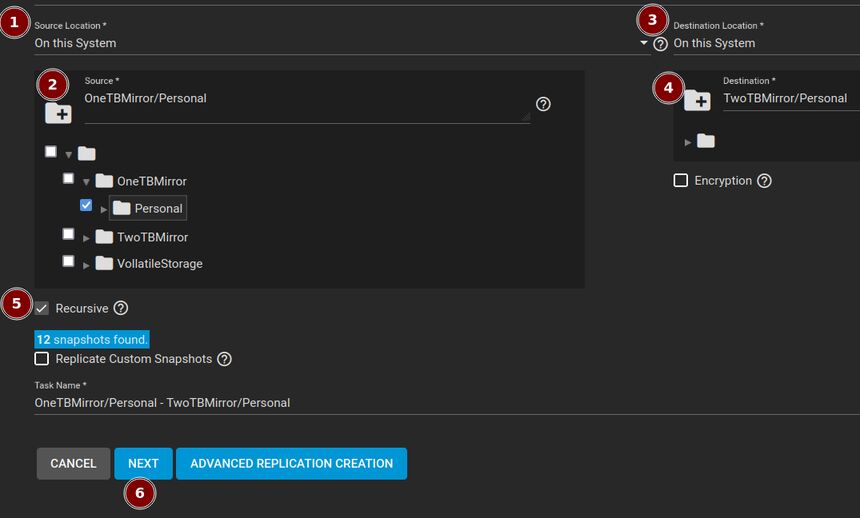
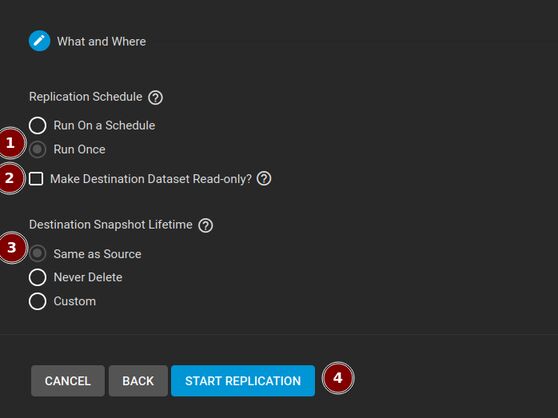
You will then be given a bunch of options for replication, I have labeled from 1 - 6 the options that I’m applying:
-
Source Location: This system. Since I only have one system and am just copying between pools, I want to choose this system.
-
The source path of the dataset you want to replicate. In this case
OneTBMirror/Personalis my source. -
Destination Location: This system. Since I want the new data to be on the same system.
-
The destination path for the dataset. In this case
TwoTBMirror/Personalis my desktination. -
Check recursive mode. The docs say this all snapshots contained in the source dataset snapshots. I want to take everything and I know I have snapshots in child data sets, so I’m checking this.
-
Next page of the wizard.
-
Run Once. Since this is a one-time job, I only want to run it once.
-
Uncheck Destination Dataset Read-only. I am going to be using this new dataset actively, I don’t want read only.
-
Destination Snapshot Lifetime Same as Source. Keep snapshot lifetime the same.
-
Start replication.
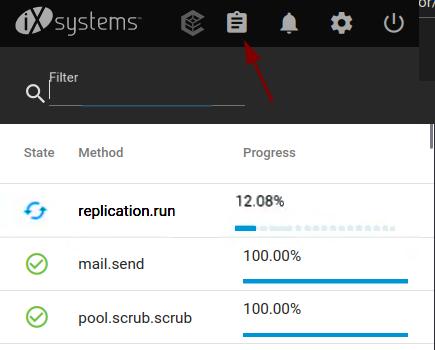
Once you hit start you will be able to monitor the progress of the replication by clicking the Task Manager in the top right:
After replication
Once the replication task is done, you should check that all the files were copied over and they both match.
The easiest way of doing this is using rsync.
In the bottom left of the webui click the Shell button to get a new terminal.
From here we can run rsync on the datasets:
$ rsync -rvn <src> <dst>
Where <src> is /mnt/OneTBMirror/Personal/ and <dst> is /mnt/TwoTBMirror/Personal
NOTE: the first argument ending with a / is important! it tells rsync that you mean the contents in the directory rather than the directory itself. For example, without it, it might think to copy /mnt/OneTBMirror/Personal to /mnt/TwoTBMirror/Personal/Personal instead of the contents of the src into the destination.
The flags meaning:
-
-rMeans recursive, search all subfolders -
-vMeans verbose, show lots of information -
-nMeans dry run, do NOT actually do any copying / moving we just want the output
This command will print off all the files which are missing, from the new dataset and once you have confirmed this is correct, you can remove the -n flag to actually copy these files over.